Microk8s是一个集成化的容器管理平台,与Kubernetes完全兼容,主要面向工作站、边缘计算和IoT等领域建立容器计算平台。
安装 microk8s
1 | snap install microk8s --classic --channel=1.15/stable |
设置别名
1 | sudo snap alias microk8s.kubectl kubectl |
config配置
1 | sudo microk8s.kubectl config view --raw > $HOME/.kube/config |
启用k8s组件
1 | microk8s.enable dashboard dns ingress istio registry storage |
如果有GPU
1 | microk8s.enable gpu |
执行 microk8s.enable 顺利的话,你将看到类似下面的日志
1 | logentry.config.istio.io/accesslog created |
使用 microk8s.status 检查各个组件的状态
1 | microk8s is running |
使用 microk8s.inspect 排查下安装部署结果
1 | Inspecting services |
执行如下命令
1 | sudo ufw default allow routed |
再次使用 microk8s.inspect 命令检查,会发现 WARNING消失了
使用 microk8s.kubectl get pods --all-namespaces 查看当前 Kubernetes pods 状态
1 | NAMESPACE NAME READY STATUS RESTARTS AGE |
大部分pod都没有启动起来,什么原因呢?
使用 describe 命令查看 pod
1 | kubectl describe pod default-http-backend -n container-registry |
日志如下
1 | Events: |
这是 pod 的 sandbox 镜像拉取失败。
网上查资料,k8s.gcr.io/pause:3.1 是存放在 google cloud 上的镜像,由于众所周知的原因,访问失败了。
解决的方法有:
- 科学上网
- 手动下载镜像
方法1操作流程
编辑 MicroK8s 使用的 docker 环境变量配置文件,vim /var/snap/microk8s/current/args/containerd-env在其中添加代理配置
1 | HTTPS_PROXY=https://127.0.0.1:8123 |
重启 docker
1 | sudo systemctl restart snap.microk8s.daemon-docker.service |
重置 MicroK8s 并再次尝试安装各种组件
1 | microk8s.reset |
方法2操作流程
安装 docker
1 | sudo apt install docker-ce |
感谢微软 azure 提供 gcr 镜像下载:地址
1 | docker pull gcr.azk8s.cn/google_containers/pause:3.1 |
v1.14 之后 microk8s 使用 containerd 代替 dockerd,具体可见这个issue
Indeed in the 1.14 release contanerd replaced dockerd.
要么使用私有仓库 registry,要么手动把 docker 镜像导入到 containerd。microk8s 官网提供了例子:Working with locally built images without a registry。 这里先使用手动操作,以后再建立私有仓库
1 | docker save k8s.gcr.io/pause:3.1 > pause.tar |
-n 是指定 namespace。microk8s.ctr -n k8s.io image ls,看到导入的镜像了:
1 | k8s.gcr.io/pause:3.1 application/vnd.oci.image.manifest.v1+json sha256:3efe4ff64c93123e1217b0ad6d23b4c87a1fc2109afeff55d2f27d70c55d8f73 728.9 KiB linux/amd64 io.cri-containerd.image=managed |
其他组件如果遇到gcr.io无法访问的情况也可使用如上的方法,这里特别写了个脚本来自动下载并导入这些镜像
1 | !/usr/bin/env bash |
使用 microk8s.kubectl get pods --all-namespaces 继续进行验证
1 | NAMESPACE NAME READY STATUS RESTARTS AGE |
如果你看到的结果类似上面这样,说明 Kubernetes 是真的就绪了。
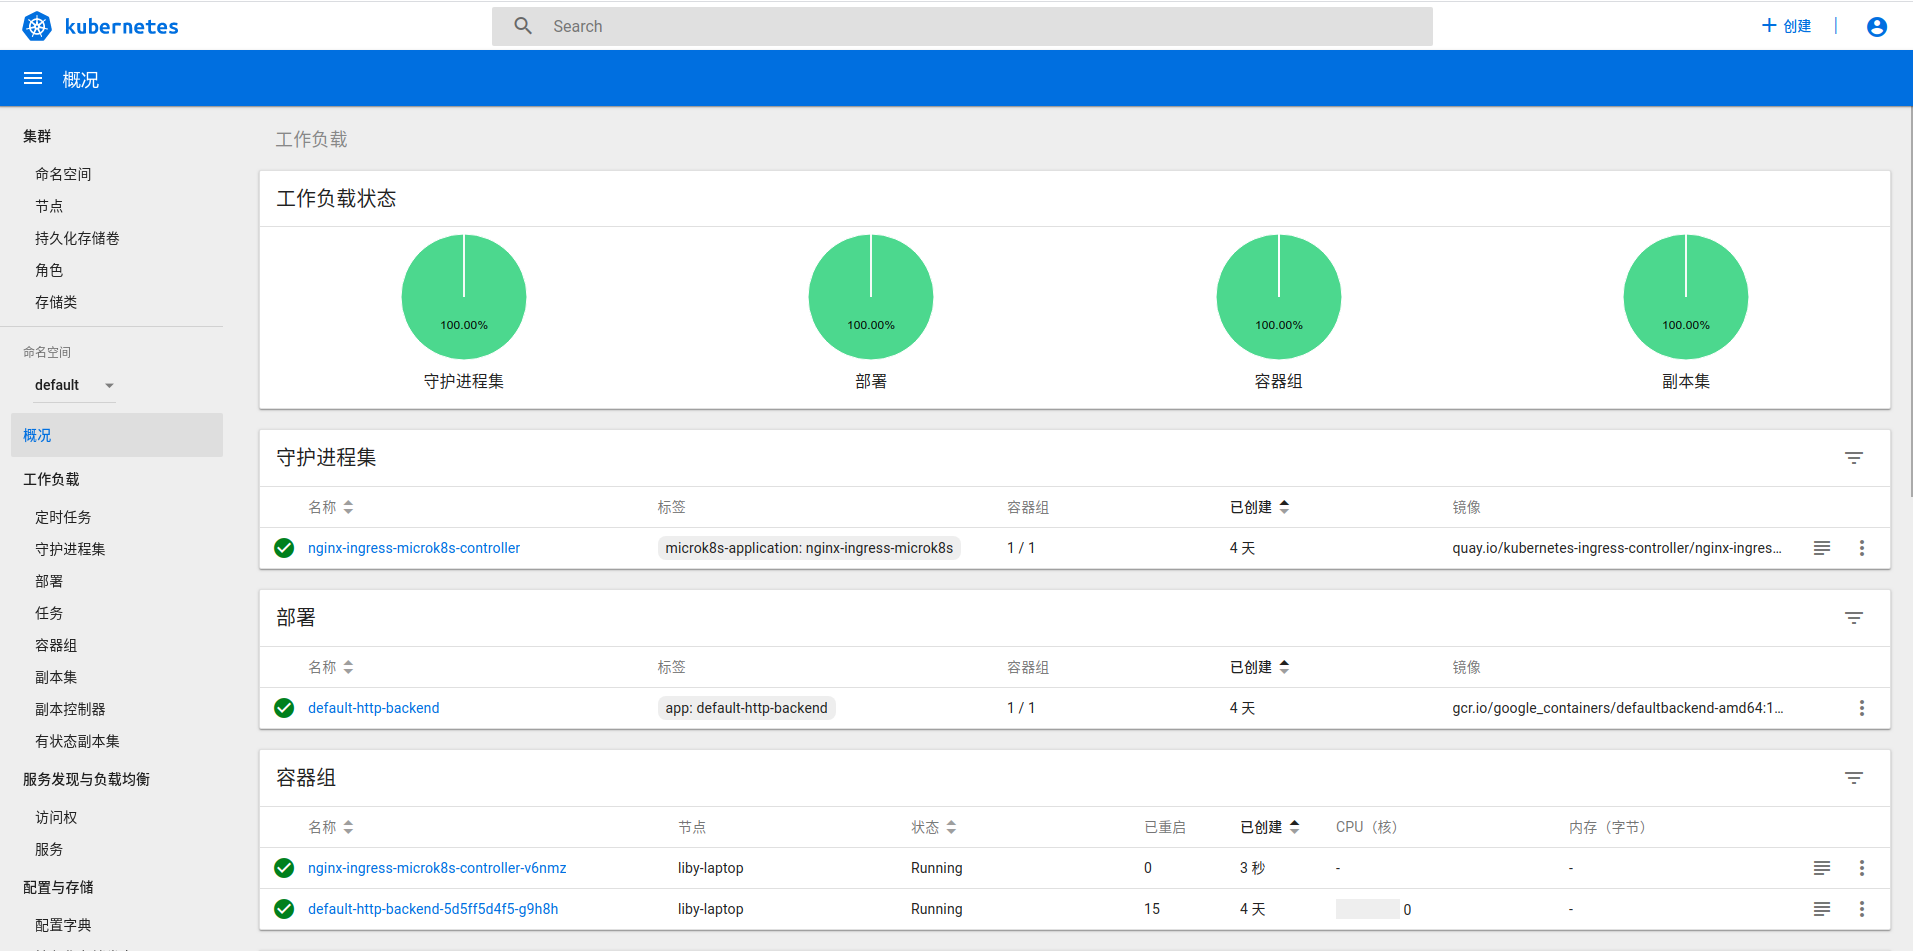
查看 Dashboard
microk8s.kubectl describe service kubernetes-dashboard -n kube-system获取访问ip和端口
1 | Name: kubernetes-dashboard |
接着访问下面的地址,就能看到我们熟悉的 Dashboard
1 | https://10.152.183.151/ |
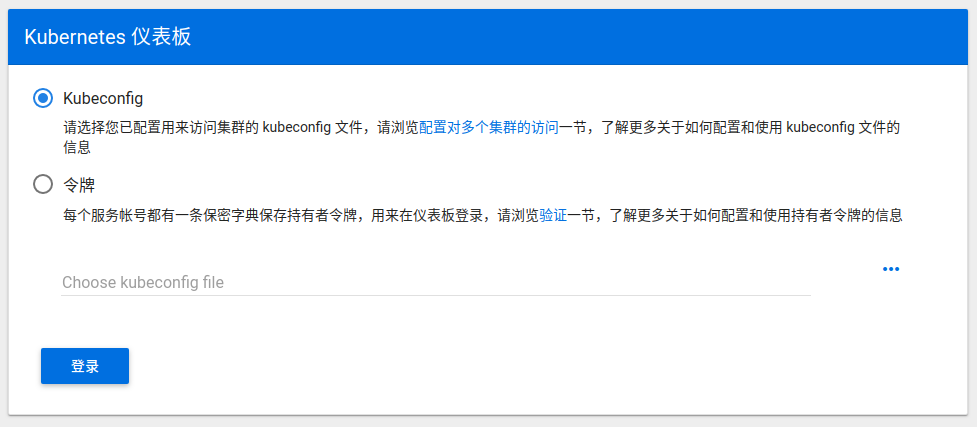
使用令牌登录
获取token
1 | token=$(microk8s kubectl -n kube-system get secret | grep default-token | cut -d " " -f1) |
输入token后就进入管理页面了